-
Install Self-signed SSL with IIS 6.0
Posted on September 23rd, 2010 Add commentsThe IIS 6.0 resource kit is provided by Microsoft for installing a self-signed testing certificate into IIS. To install it, do follow:
- Download IIS 6.0 resource kit tools from Here
- Install the resource kit, but only for Windows Server 2003 or Windows XP
- Go to Start Menu -> All Progrem -> IIS resource -> SelfSSL, click “SelfSSL”
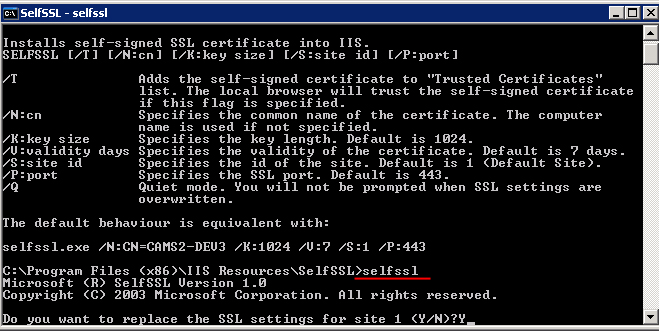
- In the pop-up command prompt, type “selfssl” to run the program
- Type “Y” to apply the setting to the website in IIS
- Test your website by using URL “https://user_website”
706 views -
Multiple websites in IIS on Windows XP Pro
Posted on August 17th, 2010 Add commentsUnlike Windows Server Edition, XP pro does not support multiple websites in IIS. However, we still can use several ways around this.
First option, just use IIS Admin, a simple program developed by a third-party developer for this purpose. (Download From Here)
The second option is to use adsutil.vbs, located in the folder “C:\Inetpub\AdminScripts”:12345C:\Inetpub\AdminScripts> adsutil.vbs ENUM /P W3SVC#(Find out what the highest numbered site you currently have is)C:\Inetpub\AdminScripts> adsutil.vbs create_vserv W3SVC/x#(Create a new website, Add one to the highest numbered site)Where x is replaced by the new numbered site. For example if you run the first command and the highest numbered site is 4, then replace x to 5.
12C:\Inetpub\AdminScripts> adsutil.vbs copy W3SVC/1 W3SVC/x#(Copy website 1 to website x)The third option is to use Metabase Explorer from the IIS 6.0 Resource Kit Tools.Copy the default website (/LM/W3SVC/1/) and then paste it. This will also give you another website, ready to use. (Download From Here)
Also we can delete the website using adsutil.vbs, Metabase Explorer or ADSI/WMI. To delete a website using adsutil.vbs, write this in a command prompt:1C:\Inetpub\AdminScripts> adsutil.vbs delete W3SVC/x
610 views -
修改常用浏览器临时文件存放位置
Posted on June 8th, 2010 2 comments浏览器的临时文件往往默认存放在C盘中,导致C盘的空间越来越少,所以最好把这些临时文件放在其他地方,以保证C盘的空间。下面就分别介绍如何将IE、Firefox和Chrome的临时文件转移:(点击图片可看大图)
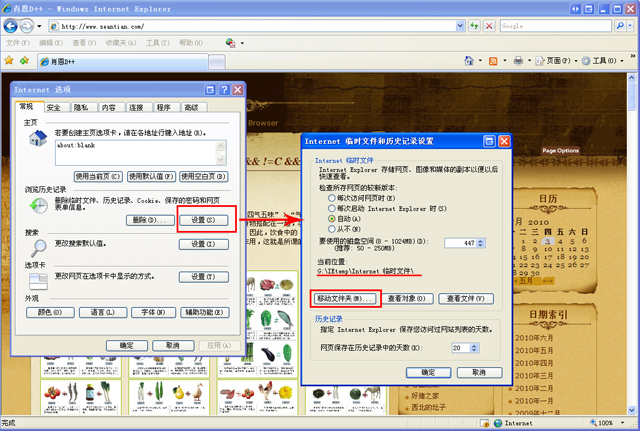
1. IE浏览器:- 打开IE,选择:工具->Internet选项->常规->浏览历史记录->设置
- 在弹出的设置窗口中,点击“移动文件夹”后,将文件夹移动到其他盘,例如:G:\IEtemp下
- 如果移动过慢,说明临时文件太多太大,可以先选择:工具->Internet选项->常规->浏览历史记录->删除,然后再移动
2. Firefox浏览器:
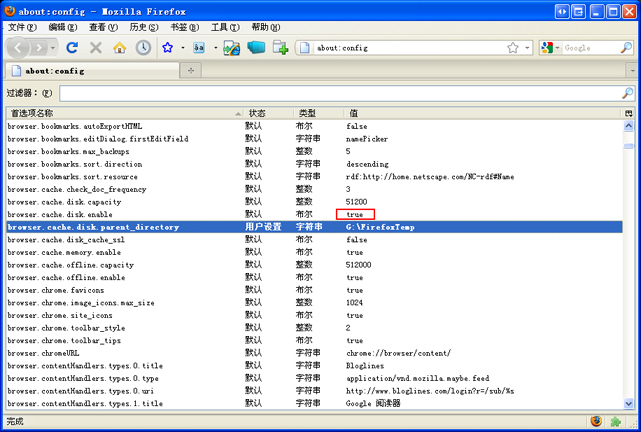
- 打开Firefox,在地址栏输入“about:config”,firefox将会显示设置界面
- 找到“browser.cache.disk.enable”,将其值改为“true”
- 新建字符串“browser.cache.disk.parent_directory”,值设为要存放临时文件的文件夹,例如:G:\firefoxTemp
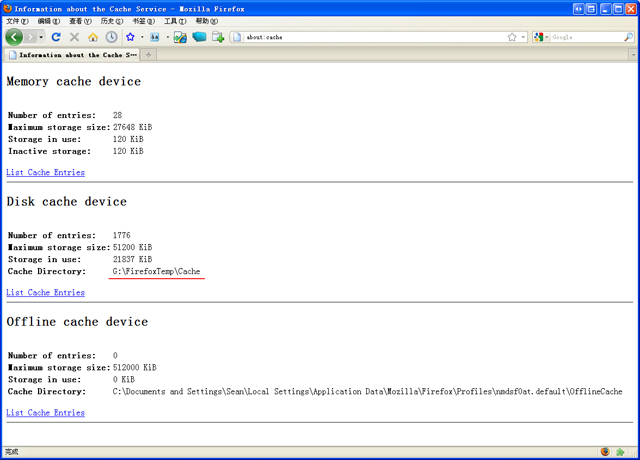
- 重启Firefox,在地址栏输入“about:cache”,可看到设置已成功
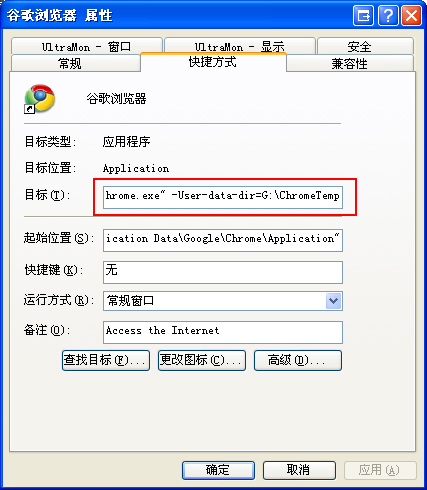
3. Google Chrome浏览器:
2,041 views -
How to add Google adsense for search into the website
Posted on May 29th, 2010 2 comments- 1. Go to Google Adsense and sign into your account (if you don’t have it, need a google account to create one)
- 2. Click the “AdSense Setup” tab
- 3. Select AdSense for search as the product
- 4. Select your search type — for now, choose “Only sites I select”, later will modify the code allow user to choose what type of search they do
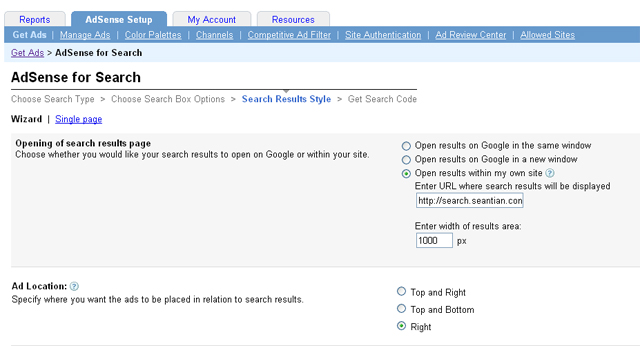
(Click pics for bigger view)
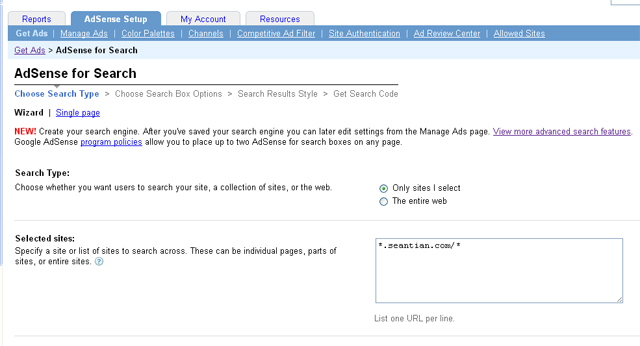
- 5. Enter the site you specify to search across
- 6. Design your search box by choosing Google Logo placement, background color, and text box size.
- 7. Choose your search results page, Ad location and style — for me, I choose “Open results within my own site”, and for the field of “Enter URL where search results will be displayed” enter “http://search.seantian.com” (a subdomain I wanna keep my search engine with)
- 8. Enter a name for search engine and click “Submit and Get Code”
- 9. You will get two code for “Search Box Code” and “Search Results Code”, paste the “Search Box Code” into the page where you’d like your search box to appear, paste “Search Box Code” and “Search Results Code” into the page where you would like your search results to appear.
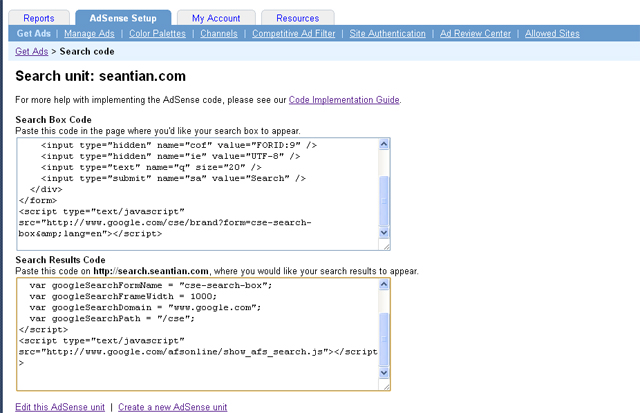
- 10. Modify the “Search Box Code” in the search results page like below, allow user to choose only search within the specify website, or entire web
- The original code:
- The modified code:
12345678910<form action="http://search.seantian.com" id="cse-search-box"><div><input type="hidden" name="cx" value="partner-pub-1234567890:lpux" /><input type="hidden" name="cof" value="FORID:9" /><input type="hidden" name="ie" value="UTF-8" /><input type="text" name="q" size="20" /><input type="submit" name="sa" value="Search" /></div></form><script type="text/javascript" src="http://www.google.com/cse/brand?form=cse-search-box&lang=en"></script>123456789101112131415<form action="http://search.seantian.com" id="cse-search-box"><div><input type="hidden" name="cof" value="FORID:9" /><input type="hidden" name="ie" value="UTF-8" /><input type="text" name="q" size="20" /><input type="submit" name="sa" value="Search" /><input type="radio" name="sitesearch" value="!partner-pub-1234567890:lpux" />The Web<input type="radio" name="cx"value="partner-pub-1234567890:lpux" />/**"partner-pub-1234567890:lpux" is your adsense for search ID**/seantian.com</div></form><script type="text/javascript" src="http://www.google.com/cse/brand?form=cse-search-box&lang=en"></script>
Check out how it looks like Sean’s Search
667 views -
How to get Latitude and Longitude values of an address on Google Maps
Posted on May 6th, 2010 6 commentsBasically Google Maps do not display the latitude and longitude values for an address, but you still can use some methods to find it.
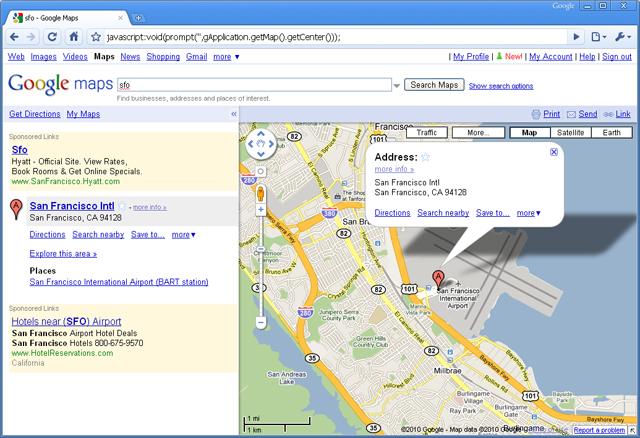
- Run a trick javascript to find it
- 1. Find an address you want to get the values for
- 2. Click the address to make it showing on the center of Google Maps
- 3. When the location you want is in the center of the map, copy and paste this code into the location bar of your browser and press enter:
javascript:void(prompt('',gApplication.getMap().getCenter()));
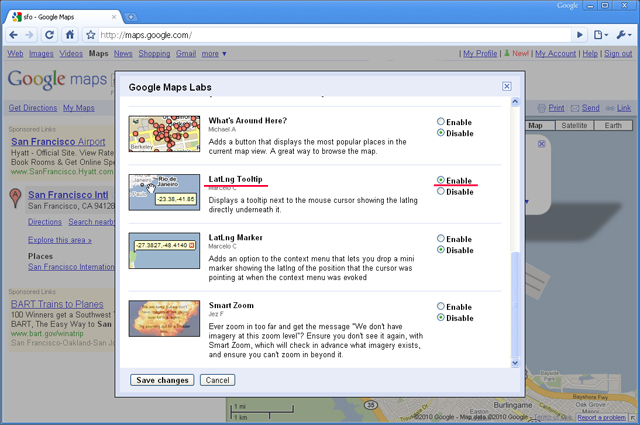
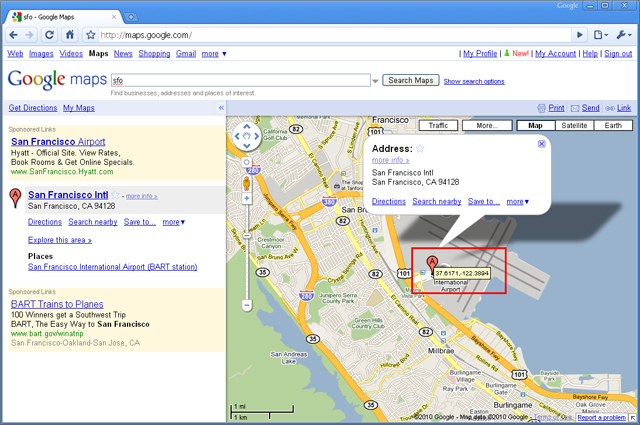
- Use Google Labs to find it
- 1. Go to Google Maps and login your Google account
- 2. Go to the upper-right corner and select the green icon
 of Google Labs
 - 3. Scroll down to the LatLng Tooltip and select it’s Enable radio button.
696 views - Run a trick javascript to find it




Recent Comments